I have been stealing some time away from having to put sleeves on my quilts and making progress on my uanduqal blocks.
When I made first few, I wasn't sure where this was going to go or if I will be able to stick with it. I don't usually do foundation piecing. I like to just cut my fabrics and sew but this is a different kind of quilts and it required the good old phone book, and lots of little pieces from shirts and few solids.
Every morning I make a few and later in the evening when time permits, I have been trimming them. It has gone pretty well so far.

It took no time to fill this design wall up. I am working with 9"X 9" blocks so you can see how small this design wall is. It is good to see them on the wall though, it gave me an idea on which direction to go.
It is mindless sewing but I am mindful about picking my colors and textures next to each other. Just because a quilt is scrappy, doesn't mean I let go of my need to design.
Once I ran out of space, I decided to just have fun arranging them in a beehive pattern.

Oh dear! There is another idea for a quilt! I am telling you I could devote this entire year for the quilts inspired from U and U! It is that good!
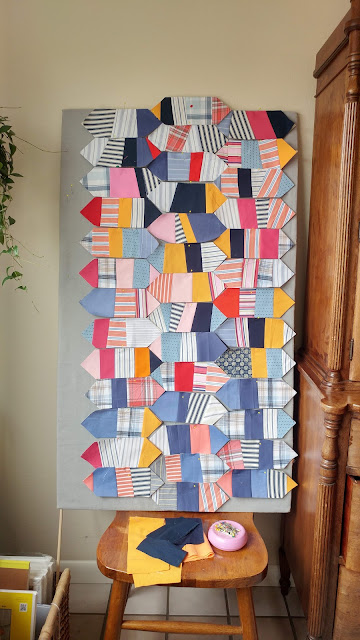
As you know, initially I had decided not to work with Y seams but it will be a great quilt if I can pull it off.
For those of you, who might want to stay away from those painful seams, there is another way of working with squares.
Isn't this exciting? The more I look at the pattern better it gets!
So how would you avoid the Y seams?
It's simple. Make your blocks square!

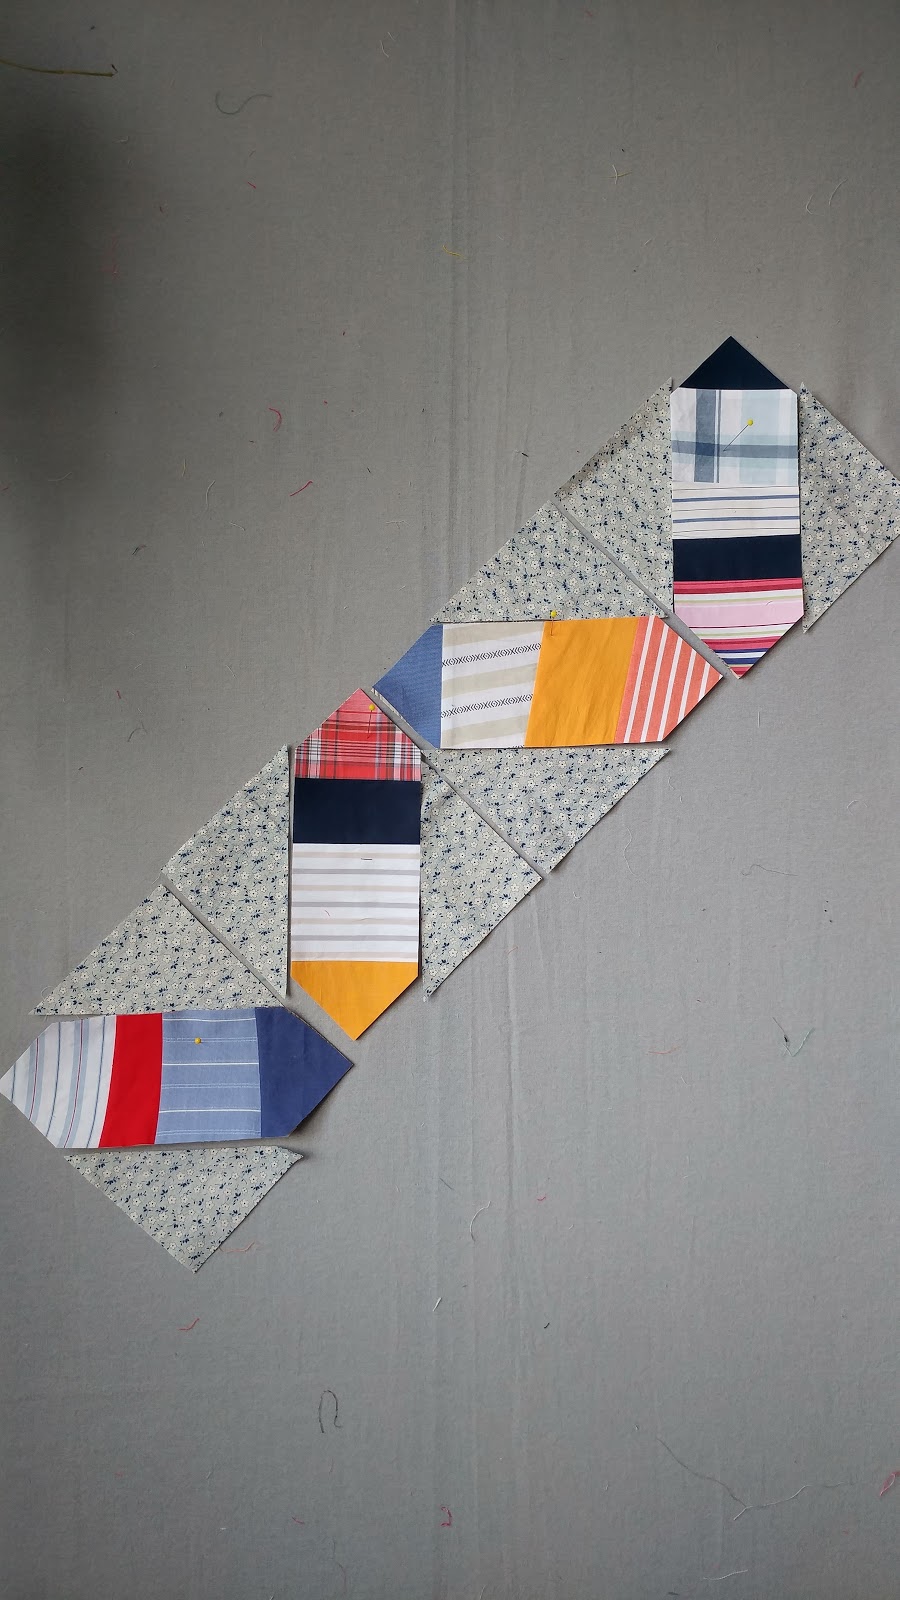
This is for a nine inch finished block. I would simply add setting triangles on either side. I cut mine at 5 inches and then cut once diagonally to finish the square. Yes, you will see that seam in the middle but if you use solid fabric it won't show after quilting and if you use prints, oh what better than add more texture to the quilt?
Once your square blocks are done, you will simply use the diagonal setting and set the blocks on point to finish the quilt top. You will need setting triangles at the end to finish the edges.

How about that?
So those of you who are struggling with quarter Square triangles not working, you can still use these blocks and make them look like continuous octagon shape.
I have made a little stack here and I plan to continue.

I hope all of you who are in deep freeze weather are staying warm.
Sujata
When I made first few, I wasn't sure where this was going to go or if I will be able to stick with it. I don't usually do foundation piecing. I like to just cut my fabrics and sew but this is a different kind of quilts and it required the good old phone book, and lots of little pieces from shirts and few solids.
Every morning I make a few and later in the evening when time permits, I have been trimming them. It has gone pretty well so far.

It took no time to fill this design wall up. I am working with 9"X 9" blocks so you can see how small this design wall is. It is good to see them on the wall though, it gave me an idea on which direction to go.
It is mindless sewing but I am mindful about picking my colors and textures next to each other. Just because a quilt is scrappy, doesn't mean I let go of my need to design.
Once I ran out of space, I decided to just have fun arranging them in a beehive pattern.

Oh dear! There is another idea for a quilt! I am telling you I could devote this entire year for the quilts inspired from U and U! It is that good!

As you know, initially I had decided not to work with Y seams but it will be a great quilt if I can pull it off.
For those of you, who might want to stay away from those painful seams, there is another way of working with squares.
Isn't this exciting? The more I look at the pattern better it gets!
So how would you avoid the Y seams?
It's simple. Make your blocks square!

This is for a nine inch finished block. I would simply add setting triangles on either side. I cut mine at 5 inches and then cut once diagonally to finish the square. Yes, you will see that seam in the middle but if you use solid fabric it won't show after quilting and if you use prints, oh what better than add more texture to the quilt?
Once your square blocks are done, you will simply use the diagonal setting and set the blocks on point to finish the quilt top. You will need setting triangles at the end to finish the edges.
How about that?
So those of you who are struggling with quarter Square triangles not working, you can still use these blocks and make them look like continuous octagon shape.
I have made a little stack here and I plan to continue.

I hope all of you who are in deep freeze weather are staying warm.
Sujata


